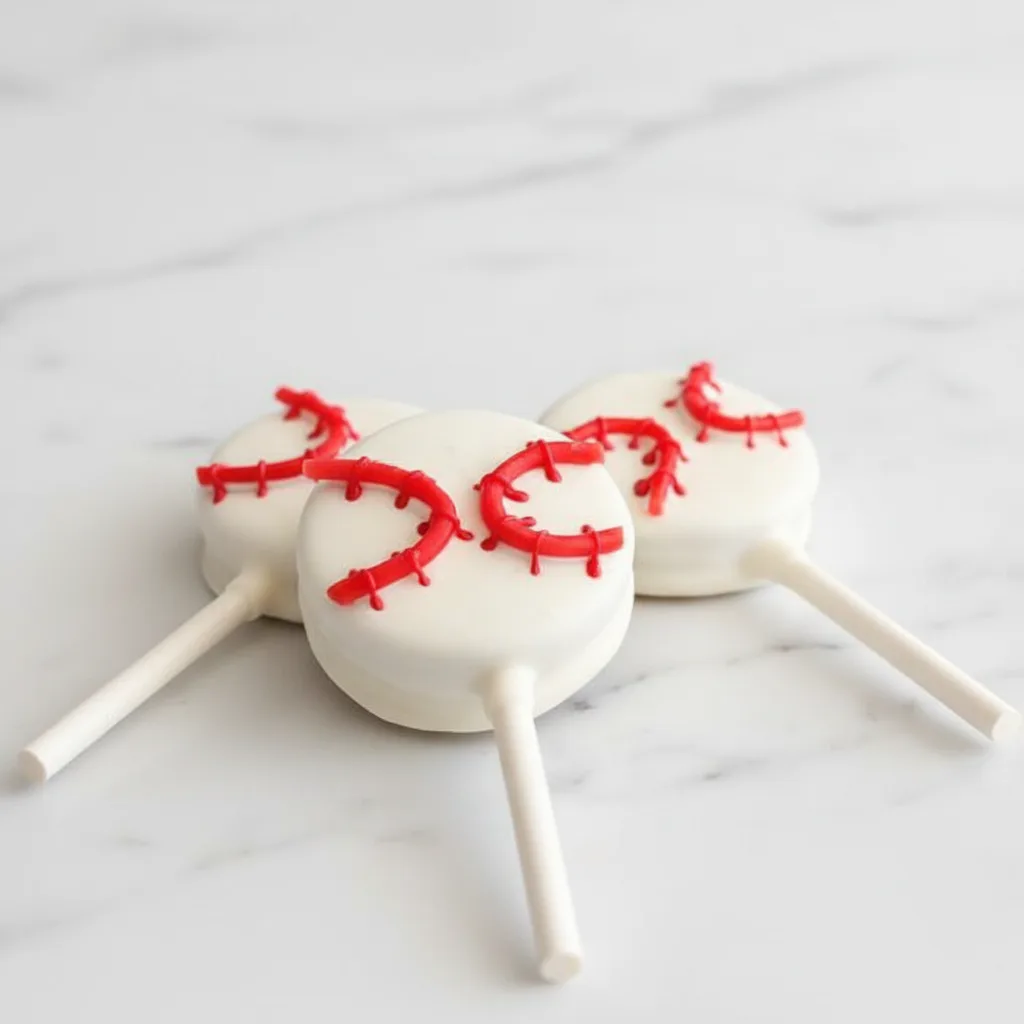
Get ready to hit a sweet home run with these adorable and delicious Baseball Chocolate Covered Oreos. This fun treat transforms classic cookies into playful baseball pops perfect for game day, birthday parties, or any festive gathering.
The process is surprisingly simple, and the final result always brings big smiles. You will create delightful Oreo pops coated in smooth white candy coating, then add the iconic red laces with colorful candy melts and chewy licorice. Ultimately, this recipe delivers a fantastic combination of crunch, creamy filling, and sweet chocolate in a fun, decorative package.
Why You’ll Love This Recipe
You will love this recipe for many fantastic reasons. First, it requires no baking, making it a perfect kitchen project for any skill level. The steps are easy to follow, and the ingredients are simple to find at most grocery stores.
Furthermore, these treats are incredibly versatile. You can customize the colors for different sports teams or holidays with ease. They make excellent party favors, dessert table centerpieces, or a fun activity to do with kids.
Finally, the sweet and salty combination of the cookie and the candy coating is downright irresistible. Everyone will cheer for these playful and tasty desserts.
Recipe
Print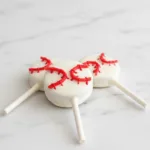
Baseball Chocolate Covered Oreos
- Total Time: 30 min
- Yield: 12 servings 1x
Description
Fun and easy Oreo pops decorated to look like baseballs, perfect for game day or parties.
Ingredients
- 12 Oreo cookies
- 2 cups white candy melts (340 g)
- 1 cup red candy melts (170 g)
- 1 package red shoestring licorice
- 12 Lollipop sticks
- 1 sheet Parchment paper
- 1 Decorating bag
Instructions
- Lay out a piece of parchment paper onto a baking sheet.
- Heat your white candy melts on 50% power for 3-4 minutes, stirring every 30 seconds until melted.
- Open each Oreo, dip the end of each lollipop stick heavily into the melted chocolate and press your stick carefully into the white filling.
- Scoop a little extra melted candy melts onto the center and press the cookies together.
- Allow the chocolate to harden then hold the stick and dip the Oreo into the melted chocolate, letting any excess drip off.
- Place the Oreo pops onto your parchment paper lined baking sheet and transfer the sheet to the freezer for 10 minutes.
- Heat your red candy melts on 50% power for 3-4 minutes, stirring every 30 seconds until melted, pour into a decorating bag and cut a tiny tip off the bottom.
- Cut your shoestring licorice into 1 1/2” pieces, dip one side into the melted white chocolate and carefully press onto each side of the Oreo pops in the shape of half circles for baseball laces.
- Use the melted red candy decorating bag to draw about 5-6 laces on each licorice strip and let harden.
Notes
- Work with cold Oreo pops when adding the licorice laces to prevent sliding.
- If candy coating is too thick, stir in 1/4 tsp of coconut oil to thin.
- Store finished pops in a single layer in an airtight container at room temperature.
- Prep Time: 20 min
- Cook Time: 10 min
- Category: Main Course
- Method: Baked
- Cuisine: American
Nutrition
- Calories: 180 kcal
- Sugar: 20 g
- Sodium: 80 mg
- Fat: 9 g
- Carbohydrates: 23 g
Ingredients and Substitutions
Gathering your ingredients is the first step to success. Here is what you need and some clever swaps you can make.
Base Components
- Oreo Cookies: Use regular or Double Stuf Oreos. The Double Stuf provides extra cream for the stick to anchor into.
- Lollipop Sticks: You can find these at craft stores or online. Paper straws cut in half can work in a pinch.
- Parchment Paper: This is essential for preventing sticking. Wax paper can also work, but parchment is best.
Coatings and Decorations
- White Candy Melts: These provide the perfect white baseball color and easy melting. You can also use white chocolate chips mixed with a teaspoon of coconut oil.
- Red Candy Melts: These create the iconic red stitching. Pink or blue melts make fun variations for other themes.
- Red Shoestring Licorice: This forms the base of the baseball laces. If you cannot find it, thin red fruit leather strips are a great alternative.
- Decorating Bag: A small plastic bag with the corner snipped off works just as well for piping the red details.
How to Make Baseball Chocolate Covered Oreos
Follow these simple steps to create your baseball pops. The process is straightforward and enjoyable.
Step 1: Prepare Your Station
First, lay a large sheet of parchment paper on a baking sheet. This will be your drying station. Next, separate your Oreo cookies carefully. You want to keep the cream filling intact on both sides. Then, prepare your lollipop sticks and have them ready. Organization makes the whole process smoother.
Step 2: Melt and Secure
Place your white candy melts in a microwave-safe bowl. Heat them on 50 percent power for three to four minutes. Importantly, stir the melts every thirty seconds until they are completely smooth.
Then, take a lollipop stick and dip the tip heavily into the melted coating. Press this coated end firmly into the cream filling of one Oreo half. Scoop a little extra melted candy onto the center and press the other cookie half on top. This creates a strong seal around the stick. Allow this to harden for a few minutes.
Step 3: Coat the Pops
Once the base chocolate is set, hold the stick and dip the entire Oreo into the remaining melted white candy coating. Swirl it gently to cover completely. Let any excess coating drip back into the bowl. Place the coated pop onto your parchment-lined sheet. Repeat with all pops, then transfer the entire baking sheet to the freezer for ten minutes. This sets the coating quickly for a smooth finish.
Step 4: Create the Baseball Laces
While the pops chill, prepare your red decorations. Cut the red shoestring licorice into one-and-a-half-inch pieces. You will need two pieces per pop. Melt the red candy melts using the same gentle microwave method. Pour the melted red candy into your decorating bag and snip a very tiny hole in the tip.
Remove the pops from the freezer. Dip one end of a licorice piece into the reserved white coating and carefully press it onto the side of an Oreo pop in a half-circle shape. Repeat on the opposite side to form the iconic baseball lace pattern.
Step 5: Add the Final Stitches
Finally, use your decorating bag of red candy melts to pipe five or six small “stitch” lines across each licorice half-circle. Let the pops sit at room temperature until the red candy completely hardens. Your edible baseballs are now ready to play ball.
Pro Tips for Success
Use these expert tips to ensure your treats turn out perfect every single time. First, always melt candy coating slowly. High heat can cause it to seize and become lumpy. Stirring frequently is the key to a smooth, dippable consistency. Second, make sure your Oreo pops are completely cold before adding the licorice laces.
A firm base prevents the decorations from sliding. Third, if your coating becomes too thick, you can stir in a tiny amount of coconut oil to thin it. Finally, work in small batches. Melting a little extra coating halfway through is easier than trying to re-melt a large hardened batch.
Flavor Variations
This recipe is a fantastic canvas for creativity. For a different twist, try using golden Oreos instead of chocolate. Coat them in orange candy melts for a fun baseball-themed treat. You can also roll the dipped pops in colorful sprinkles before the coating sets for a festive look. For a richer flavor, use dark cocoa candy melts for the coating.
Consider adding a drop of mint or orange extract to the white candy melts for a subtle flavor surprise. The possibilities are nearly endless, just like a fun beef steak fajita bowl offers room for customization.
Serving Suggestions
These Baseball Oreo Pops are a standout dessert all on their own. For a party, stand them upright in a tall vase or a block of styrofoam covered in green tissue paper to look like a baseball field.
Alternatively, arrange them on a platter surrounded by popcorn and pretzels for a classic game-day snack spread. They also pair wonderfully with a scoop of vanilla ice cream for an extra decadent treat. For a balanced meal, consider serving them after a lighter main dish like this delicious Caprese stuffed chicken.
Storage and Freezing Instructions
Store your completed Oreo pops in a single layer in an airtight container at room temperature. They will stay fresh for up to one week. For longer storage, you can freeze them.
Place the hardened pops in a freezer-safe container with parchment paper between layers. They will keep for up to two months. Thaw them at room temperature for about thirty minutes before serving. Do not refrigerate them, as condensation can make the candy coating sticky.
Nutrition Facts per Serving
| Calories | Fat | Carbs | Protein | Fiber | Sugar | Sodium |
|---|---|---|---|---|---|---|
| 180 kcal | 9 g | 23 g | 1 g | 0.5 g | 20 g | 80 mg |
FAQs About Baseball Oreo Pops
Can I use almond bark instead of candy melts?
Yes, absolutely. Almond bark works very well as a coating. It melts smoothly and sets with a nice snap. Follow the same melting instructions on the package.
My candy coating is too thick. What should I do?
This is a common issue. Simply add a small amount of coconut oil or vegetable shortening, about half a teaspoon at a time, and stir until you reach the desired dipping consistency.
How far in advance can I make these?
You can make these pops up to three days in advance. Store them properly in an airtight container at room temperature. For the best texture and appearance, add the licorice and red piping on the same day you plan to serve them.
Can I make these without sticks?
Of course. Simply skip the lollipop stick step. You will have baseball-themed Oreo cookies instead of pops. They are just as delicious and easier for little hands to hold.
What if I do not have a microwave?
You can melt the candy coatings using a double boiler on the stove. Place the candy in a heatproof bowl over a pot of simmering water. Stir constantly until melted and smooth.
Final Thoughts
Creating these Baseball Chocolate Covered Oreos is a joyful and rewarding kitchen project. They combine simple techniques with a big visual payoff, making them perfect for anyone who loves to make edible crafts. The process is fun for bakers of all ages, and the delicious results are guaranteed to be a crowd-pleaser.
Whether you are hosting a sports party or just want a special sweet treat, this recipe delivers. For another family-friendly recipe that is both easy and satisfying, explore this simple zucchini noodle chicken alfredo. Now, gather your ingredients and get ready to create a winning dessert that scores a home run with every bite.